
Progressive Web Apps in React (PWA Guide)
Have you thought of how you could get your website or your company's web application installed on mobile applications just like native apps?

In this article you will learn:
- What Progressive Web Apps (PWAs) are
- Rules of a PWA
- Create a React App as a PWA
- How to convert your existing React app to a PWA
What is a Progressive Web App?
A progressive web application (or PWA) is a web application that is built to look and behave like native apps, operates offline, allows installation, and is optimized for a variety of screens. Basically, a Progressive Web App (PWA) is an application that expands the functionality of a regular website progressively by adding features that previously were exclusive for native applications.
A couple of big companies have switched to using PWAs since its creation in 2015, let's take a look;
- Twitter: The benefits of using PWA over the traditional app? Well, it takes up less storage for a start, 3% less disk space to be exact for the Android version. Twitter has credited this with a 75% increase in the number of Tweets, a 65% increase in pages per session, and a 20% decrease in bounce rates.
- Uber: Uber’s PWA, m.uber, allows you to hail a ride without downloading and installing the traditional Uber mobile app. It’s absolutely tiny, with the core service only taking up 50kb which means it loads quickly even on the poorest of connections.
- Instagram: If you visit Instagram on your mobile browser now, you’ll be accessing it via a PWA. Previously you’d have struggled with a lack of functionality, only really being able to browse your timeline or profile. Now the PWA looks just like the traditional app and gives you some extra functionality as well.
- Pinterest: built a PWA when they discovered that their website experience is too slow. On Pinterest’s PWA, users spend 40% more time compared to the previous version. Its PWA requires only 150 KB of data storage.
Rules of a PWA
- PWAs must implement service workers, service workers act as a proxy between the web browsers and API servers, which allows web apps to message and cache network requests and assets.
- PWAs must be served over a secure network, i.e the application must be served over HTTPS.
- PWAs must have a web manifest, which is a JSON file that provides basic information about the PWA, such as name, icons, splash screen, description, version of the app e.t.c.
Okay, now we understood all the benefits and reasons why your app should be a PWA, it's time to create our first PWA.
Create a React App as a PWA
Starting with Create React App 4, you can now create your react app as a PWA from scratch in one easy step. So I wouldn't be spending so much time on this.
npx create-react-app my-app --template cra-template-pwa
By typing the above command, you get a react app with a PWA template containing the Service-Workers and App Manifest.
👉🏾 TS; WM?
How to convert a react app to a PWA
Now the exciting part, converting an existing react project to a Progressive web application;
Before going over the steps, let's take a look at the lighthouse report of our React App to verify the PWA status. This can be done by navigating to lighthouse in the developer tools and clicking on Generate report.
This is what you should have (or similar):
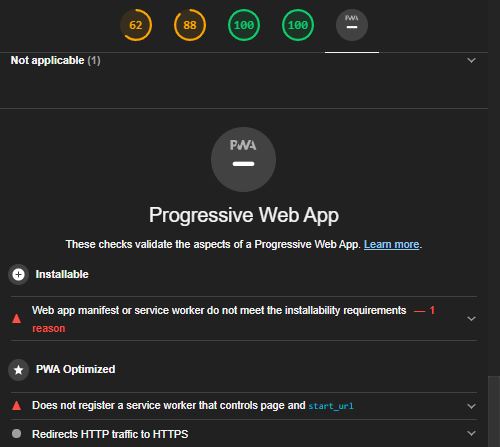
This shows that our react app isn't progressive (yet)! We are going to change this in the following steps:
1. Creating a service worker
What is a service worker? The service worker provides a programmatic way to cache app resources, be it javascript files or JSON data from HTTP requests.
Create a file called service-worker.js inside of your public folder, and add the following code:
var CACHE_NAME = 'pwa-example';
var urlsToCache = [
  '/',
  '/completed'
];

// Install a service worker
self.addEventListener('install', event => {
  // Perform install steps
  event.waitUntil(
    caches.open(CACHE_NAME)
      .then(function(cache) {
        console.log('Opened cache');
        return cache.addAll(urlsToCache);
      })
  );
});

// Cache and return requests
self.addEventListener('fetch', event => {
  event.respondWith(
    caches.match(event.request)
      .then(function(response) {
        // Cache hit - return response
        if (response) {
          return response;
        }
        return fetch(event.request);
      }
    )
  );
});

// Update a service worker
self.addEventListener('activate', event => {
  var cacheWhitelist = ['pwa-task-manager'];
  event.waitUntil(
    caches.keys().then(cacheNames => {
      return Promise.all(
        cacheNames.map(cacheName => {
          if (cacheWhitelist.indexOf(cacheName) === -1) {
            return caches.delete(cacheName);
          }
        })
      );
    })
  );
});
What the code in service-worker.js does is - define a callback for the install event and choose what to cache. Inside the callback, we open a cache, cache the files, and get confirmation that assets are cached.
2. Update Index.html
Now, update your index.html file (in the public folder) to verify the status of a service worker in the application when it loads. Place this code inside of your body tag
<script>
    if ('serviceWorker' in navigator) {
       window.addEventListener('load', function() {
         navigator.serviceWorker.register('serviceWorker.js').then(function(registration) {
          console.log('Worker registration successful', registration.scope);
           }, function(err) {
            console.log('Worker registration failed', err);
             }).catch(function(err) {
            console.log(err);
            });
            });
    } else {
       console.log('Service Worker is not supported by browser.');
    }
</script>
3. Update Index.js
Update your index.js in the src folder (src/index.js) from serviceWorker.unregister() to serviceWorker.register().
import React from 'react';
import ReactDOM from 'react-dom';
import './index.css';
import App from './App';
import * as serviceWorker from './serviceWorker';

ReactDOM.render(<App />, document.getElementById('root'));

//Updated Code here
serviceWorker.register();
4. Update manifest.json
Your react app comes with a manifest by default, but if not, then create a manifest.json file inside the public folder with the following code:
{
  "short_name": "React App",
  "name": "Create React App Sample",
  "icons": [
    {
      "src": "favicon.ico",
      "sizes": "64x64 32x32 24x24 16x16",
      "type": "image/x-icon"
    },
    {
      "src": "logo192.png",
      "type": "image/png",
      "sizes": "192x192"
    },
    {
      "src": "logo512.png",
      "type": "image/png",
      "sizes": "512x512"
    }
  ],
  "start_url": ".",
  "display": "standalone",
  "theme_color": "#000000",
  "background_color": "#ffffff"
}
The app manifest file describes the resources your app will need, this includes your app's display name, icons as well as a splash screen. You can edit the file to suit your needs
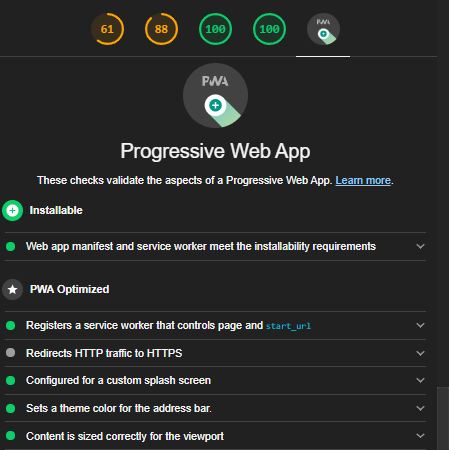
Run the application again (npm run start) you should have a running PWA, verify this by opening the Developer tools and check the Lighthouse reports:
Conclusion
An important feature of PWAs is the security (HTTPS), deploying your app would take care of this step for you. Once your app is deployed and secure, all your audit tests will be passed and users would be able to fully access a PWA :)
I hope you enjoyed reading this and could build a PWA using this article :)
Thanks! Learn more about me
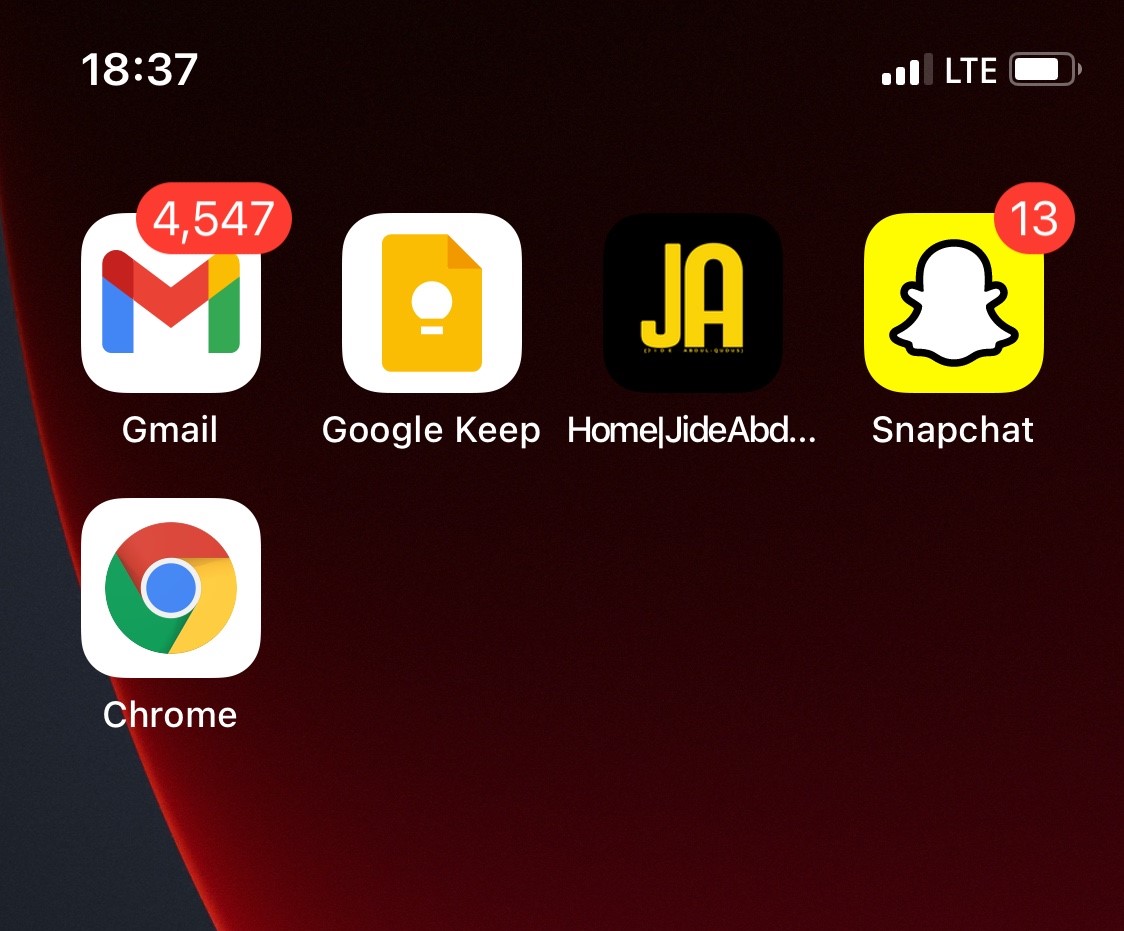
Oh, one more thing, my website is built as a PWA. Check out the mobile and desktop look here:

Resources:
Header image was designed by myself, feel free to use :)